
An essential tool for many woodworkers is a sawhorse. They are used for supporting planks and using it as a makeshift scaffold. While it’s easy to buy sawhorses for use, they are also easy to construct, and DIY ones are quite popular.
There are different types of sawhorses. This article will cover some sawhorse plans for different types of sawhorse design, along with the fundamentals of some of these plans to help you improve your work experience.
Required Tools
To make the sawhorses listed in your plans, you’ll need some specific tools. This is a rundown of some of the most necessary and common tools you’ll use for making your sawhorse.
Plywood
Most sawhorses are made out of plywood as it possesses favorable qualities and is easy to work with. ¾ inch plywood is usually needed, and they are also readily available. However, for sturdier but more expensive designs, you can make use of cedar or pine.
Nails And Screws
You’ll need nails and screws to hold the core structure together. Usually, most of the sawhorses make use of 16d nails and 2-inch screws.
Hammer
To push nails down into the wood, you will require a hammer. Any sturdy hammer will do this job smoothly.
Miter Saw
A miter saw is used to make angled cuts or miter cuts. This saw will help you make the cuts for the legs and supports.
Drill
You’ll need to drill holes into the wood. For this task, a cordless drill is recommended, although a corded drill can also suffice.
Framing Square
For cutting the notches, you will need to be able to measure it before cutting correctly. A framing square is an easy way to handle the measurements.
Glue
Lastly, you will need glue to stuck some parts of the sawhorse. We recommend you to use strong glue for this.
Sawhorse Plans | Different Types of Sawhorse Design
There are some primary keys for sawhorse designs you’ll want to have around when working. If you can learn how to make them you’ll have an easier time. These types of sawhorse designs include:
1. Classic Sawhorse
The classic sawhorse is the most basic sawhorse design. It is the easiest to make and an all-around useful tool to have for your projects. Despite it being such a basic design, the structure itself sets the standard for most sawhorses.
A classic sawhorse consists of:
One saddle: This is the part of the sawhorse you place the plank on. Four legs: A classic sawhorse design makes use of four planks of wood for the legs.
Four braces: The braces will be attached underneath the saddle.
Classic Sawhorse Plan-
The plan for making a classic sawhorse is given below:
- 1At first, start by making the saddle. Cut a piece of wood and start milling it. Most of them measure 42 inches long and are 5 inches wide with a usual thickness of 1 ½ inch.
- 2While making the saddle, make sure to plane the sides properly. Mark and cut out small pieces on four places of the saddle. These are for joining the legs.
- 3After the saddle, next comes the legs. You will need to make four of these, each measuring 28 by 5 ½ by ¾ inches. Cut the legs using a saw and use some sandpaper to smooth out the edges.
- 4Now that you have the saddle and the legs, you need to connect them all. For this, you’ll need the miter saw. The legs are miter cut at an angle of 75 degrees. This angle will provide stability when the saddle and the legs are joined.
- 5To connect the legs and saddle, apply glue to them. Then nail them together.
- 6Next, you’ll be making the braces. Cut them out, and make sure you have the edges beveled at 75 degrees. Fasten the braces using four nails.
- 7Lastly, trim the top of the saddle and the legs.
This is the basic outline for making a classic sawhorse.
2. Folding Sawhorse
Different Types of Sawhorse Design
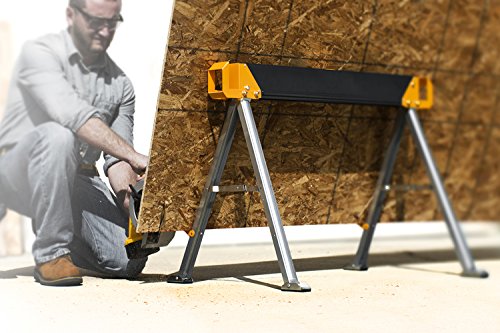
Not everyone might have the space needed to store a sawhorse, and a folding sawhorse can be the perfect solution. If you don’t have enough space, then a folding sawhorse can be a useful one to make.
A folding sawhorse consists of:
- One saddle
- Four Legs
- Four Supports
Folding Sawhorse Plan
The stepwise plan to make a foldable sawhorse consists of:
- 1To build a folding sawhorse, you will need to start with the sides first. Use a 36-inch long wooden plank for the top support and make a 20-degree bevel cut on it.
- 2Then, build two legs from 2 x 4 lumber and make the bottom support from 2 x 2 lumber. Align all of them together (use a framing square to make sure the corners are square). After that, use glue to join them together and then hammer the nails in to secure them.
- 3Repeat the process for the other side of the folding sawhorse.
- 4Place the two parts together so that they’re top supports are aligning correctly. Use hinges to stick them together and make pocket holes on one of the supports.
- 5At last, make a saddle using 2 x 4 lumber. Open up the bottom part of the sawhorse and align the saddle part properly while using the pocket holes to screw the saddle to the rest of the sawhorse.
So, this is the basic outline for making a folding sawhorse. The hinges will allow you to fold the legs together to save space.
>> How to Make Sawhorse Table >>
3. Stackable Sawhorse
Different Types of Sawhorse Design

Sometimes you’ll need multiple sawhorses. The advantage of stackable sawhorses is that you can stack one on top of the other to save space. Many woodworkers employ stackable sawhorses because many jobs call for more than one of them.
A stackable sawhorse consists of:
- Three beams to make the body.
- Two braces.
- Four legs.
Stackable Sawhorse Plan
One can easily construct a stackable sawhorse using the below steps:
- 1Take three pieces of 3 x 4 lumber measuring 32 inches long. You’ll need to make an I-beam. After that, place one of the parts horizontally and then the second piece vertically. The last bit needs to be placed horizontally to resemble the letter I. Use screws to secure the beam.
- 2For the legs, you’ll need four 2 x 4 lumber measuring 26 inches long. Secure them to the I-beam, making sure the top of the legs stay underneath the upper horizontal piece. Use four sets of screws on each of the legs to secure them to the beam.
- 3Next, you’ll make the braces. The sides of the braces should be beveled to match the angle of the legs. Once completed, you can attach them using four sets of screws each.
- 4Repeat the process if you want to make another sawhorse. You can stack them on top of each other once done.
Conclusion
These are some of the most basic but essential sawhorse plans for different types of sawhorse design. If you want to make sturdier designs, substitute the plywood with cedar. It would be best to keep in mind that the measurements should be accurate to ensure a sound construction.
I am incessantly thought about this, thanks for posting.