
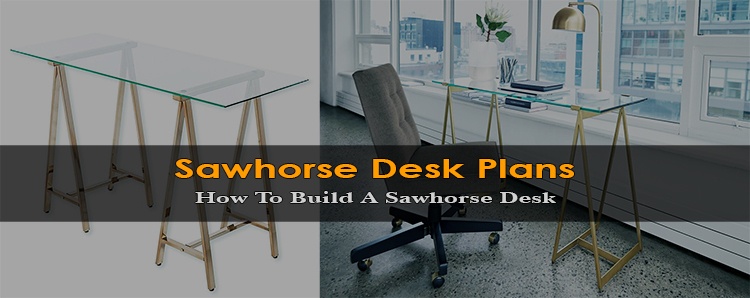
A useful sawhorse desk plan begins with the person using it, the available room and the desktop’s support requirements. Two trestles and a loose board may suggest the look, but they do not establish a stable desk or a comfortable computer workstation.
This guide helps you choose a layout and prepare the measurements for a complete furniture plan. It does not assign a load rating or prescribe one set of screws for every top. Use a coherent construction plan or a manufacturer-approved desktop and support combination for the actual build.
Start with a seated mock-up before choosing a plan
Set your chair at a comfortable height, then establish where the keyboard, mouse and frequently used items need to sit. Allow clear space for your knees, thighs, feet and chair movement.
Include the desktop thickness and any underside rails in the finished height. A workshop sawhorse that is convenient for standing cuts may be too tall or obstructive for a seated desk.
| Item | What to measure | Why it matters |
|---|---|---|
| Room | Usable width, depth and walking routes | A top that fits the wall may still block a doorway |
| Chair and user | Working height and underside clearance | The trestle braces must not trap legs or chair arms |
| Desktop | Material, thickness, unsupported span and overhang | Top stiffness depends on the full design |
| Equipment | Monitor bases, arms and other loads | A clamp or heavy device can create a concentrated load |
| Support position | Trestle footprint and top attachment | Leg clearance and stability must work together |
Layout 1: a home-office desk for one person
Begin with the equipment you use daily, including the actual monitor base, keyboard and mouse. Mark their positions on a paper outline of the proposed top. Check that a deeper monitor arrangement does not leave the keyboard far from the front edge.
OSHA’s workstation guidance emphasizes adequate leg clearance and appropriate component placement. Use that as a fit check, rather than copying a fashionable desk height from a photograph. The work surface, chair and input devices need to function together. A tall trestle base may require a different plan rather than a thicker seat cushion.
Layout 2: a craft or sewing desk
A craft layout may need room to spread material, turn a project or position a machine. List those motions before choosing the top size. Consider whether you will sit, stand or alternate, because one fixed working height may not suit every part of the task.
Equipment such as a sewing machine can introduce concentrated weight and vibration. Choose a complete top-and-base design intended for the actual use; a large distributed load rating on a work support is not proof that the desktop will remain flat beneath one machine. Keep storage out of the working leg space.
Layout 3: a narrow occasional desk
A shallow desktop can fit a small room, but it also reduces placement options and may increase interference between the trestles and the chair. Check the full leg footprint, including any splayed feet extending beyond the top.
Use an outline on the floor to test the walkway and chair position. Avoid compensating for a narrow top with excessive unsupported overhang or an unsecured monitor hanging over an edge. For occasional laptop work, decide where an external keyboard, mouse and display support would go if your use becomes longer or more frequent.
Layout 4: a shared or double desk
Two work positions need more than a longer board. Draw the users, chairs, leg zones and equipment first, then choose a complete plan with appropriate intermediate support or another specified structure. A center trestle may solve one span problem while obstructing one person’s knees.
Plan power and cable routes for both positions without placing loose wiring across walking space. If the desk will separate for moving, include the designed connections in the plan from the start. Do not simply double one desk’s dimensions and assume its joints and unsupported top remain appropriate.
Desktop material and span: choose the structure before the finish
Compare the actual top construction, not just the word “wood.” Plywood, solid lumber and a manufactured desktop need different support and attachment details. Thickness alone does not determine stiffness, especially when material, span, edge construction and loading differ.
For solid wood, account for seasonal movement using the chosen plan’s attachment method. USDA’s Wood Handbook discusses wood’s moisture-related dimensional behavior. Do not assume a wide solid top should be rigidly fixed across its grain with the same arrangement as a different sheet material.
An upcycled top needs inspection for damage, hidden fasteners and unsuitable coatings. For glass, obtain a desktop and support specification from an appropriate supplier; “use the thickest piece” and “no hardware needed” are not a furniture design. Do not substitute glass into a wooden-top plan without proper design guidance.
Attachment, bracing and load placement belong in one plan
The plan should explain how the top is retained, how the trestles resist movement and which joints or hardware are required. A loose board can slide or lift even when the supports themselves seem sturdy. Conversely, adding screws without checking length and movement requirements can damage the top.
Keep monitor-arm clamps, heavy equipment and shelf loads in the design discussion. A small clamping area may load the top differently from ordinary evenly spread desk items. Confirm the manufacturer’s mounting requirements and any reinforcement specified by the furniture plan.
Do not add storage shelves to folding or adjustable sawhorses merely because there is room between the legs. An added board can interfere with locks or change how the support works. Use a base intended for the layout and follow its instructions.
A practical build-and-check sequence
First choose the complete construction plan and confirm its materials, joints and hardware. Then reconcile its finished dimensions with your room and seated mock-up. If the fit requires structural changes, revise the design appropriately before cutting rather than improvising during assembly.
Prepare and assemble parts in the specified order, with suitable clamping and tool instructions. Apply the chosen finish according to its directions and allow the required drying or curing time; a fixed one-day rule does not cover every product.
Before placing electronics, inspect all joints, feet, attachments and the level of the work surface. Address wobble or sliding rather than adding equipment to weigh it down. Keep heavy items within the designed loading arrangement and recheck connections after moving the desk. Do not stand or sit on the desktop to test its strength.
Questions readers ask
Can I use ordinary workshop sawhorses as desk legs?
Only when their intended use, height, stability and permitted top attachment suit the desk design. A cutting-support rating alone does not verify the whole furniture assembly.
How high should a sawhorse desk be?
Fit the finished surface to the user, chair and task. Include the top thickness and underside obstructions, then check keyboard position and leg clearance.
Can I place a glass top directly on two trestles?
Do not treat that as a universal method. Obtain a suitable glass-top and support specification, including retention and edge requirements, from an appropriate supplier.
Does a longer desktop just need thicker plywood?
Not necessarily. Material, span, support arrangement, joints and concentrated loads all affect the design. Use a plan that addresses the proposed dimensions and use.
Choose a desk plan that fits both you and the room
Set the working height and clearance, choose a complete top-and-base design, then plan attachment and equipment placement together. A sawhorse desk can be a useful layout when its structure and everyday fit receive as much attention as its appearance.
Sources and editorial approach
This guide was refreshed in October 2026 using primary sources and original practical analysis. It does not claim hands-on equipment tests. The exact tool and accessory instructions govern their operation.
OSHA: desk arrangement and clearance guidance