Changing a table saw blade can be challenging for a newbie. And when you are dealing with a Ridgid table saw, it might be a bit more confusing.
If you are going through this confusion, we can help you out. Today, we will talk about the easiest way to change the blade.
Changing Ridgid Table Saw Blade- Step by Step
Are you ready? So, let us know how to change blade on Ridgid table saw without anyone’s help! Have a look at the quick and easy steps!
Step 1: Right Table Saw Blade
The first thing you have to do for changing the Ridgid table saw blade is to get the right saw blade once again. Now, keep in mind that not every blade will be excellent for your saw.
And so, while buying it, you have to be extra cautious. It is always better to search for the thinner blades. These can give you precise cuts.
On the other hand, if you want to reduce vibration and make the cuts smooth, the best option is to settle for laser-cut shots.
Go for titanium-coated blades, and they will be better in performance.
There are the 10-inch blades, and these are called combination table saw blades. With these, you can go for ripping and also settle for crosscutting. On the contrary, you have the 60-tooth blades. When you are in search of smoother and more polished crosscuts, nothing can be better than these. Whether you have a table saw or a miter saw, you can always have faith in these.
However, keep in mind that these blades might scorch the wood when you are ripping the pieces. Then comes the 90-tooth blades. The teeth of this blade are designed specially. And it works best for the veneered plywood. When you need to reduce chipping in your plywood cutting, try this one, and you’ll never regret it!
All the blades we have mentioned above are titanium blades and are highly durable. And lastly, there is another blade named Black Blades.
If you are a pro and need to cut the wide grooves in lumber with a table saw, get this one. This can be your complete dado set. And you won’t be needing any other blades in a while, trust us!
>> Checkout our list of best cabinet table saw from here >>
Step 2: Disconnect the Saw
Now, you are done with selecting the right saw blade. You are ready to change the previous blade and replace it with something new.
But before you start the whole process, make sure that you have disconnected the saw from electricity.
While dealing with any electrical tool, you have to keep in mind that it is essential to unplug it before you start working. Otherwise, the sharp teeth of your blade can cause unwanted accidents.
Also, certify that the replacing process is done in a large and open area. Don’t keep children beside as accidents can occur anytime.
Make sure you are entirely covered with protection. Gloves are necessary, and don’t forget to cover up the exposed parts of your body. You should wear full pants and full sleeves dress to avoid small cuts.
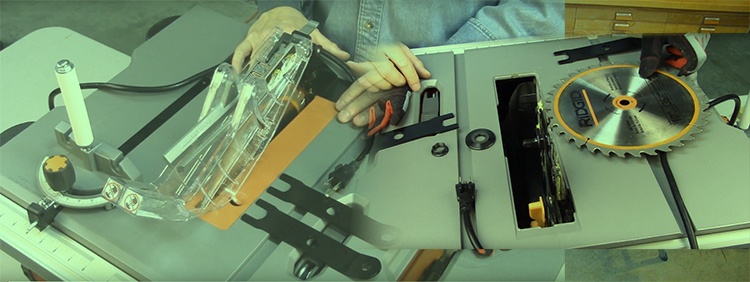
Step 3: Remove the Blade Guard
When you are done with the preparations, move for removing the blade guard. Yes, the first job is to remove the blade guard completely.
After this, move a little and go to the machine’s operator-side. Stand there for the next steps.
Note: After taking out the blade, if you see that the arbor is unclean, you can clean it.
We recommend you clean the arbor every time you take out the blade. Also, don’t forget to lubricate it. It will make the performance better than before!
Step 4: Loosening the Blade
You will need wrenches to work within this step. Check for the wrenches that are included. All you have to do is take a wrench and place it on the arbor nut. After this, you must take another one on the blade locking pin.
This will ensure that the blade is stable and is in its right place.
When you are done, you have to pull the wrench forward. It will easily loosen the nut for you.
Step 5: Replace the Blade
Take out the nuts. Make sure you don’t drop the nuts inside the saw. Wiggle the blade a bit so that you can get your hands on the washers.
After then take the old blade off and put it aside. Take the new blade and place it inside.
Please take a look at the teeth of the blade; ensure it is placed in the right direction.
The teeth must face you when you stand on the operator’s side. Put back the washers first and then the nuts.
Step 6: Tightening the Blade
After you have made the blade lose, you have to again work for tightening. Yes, this is how it works! Go through the same steps as before, but BACKWARDS! After that, instead of pull the wrench, you have to push it backward.
Note: In some cases, the saws do not come with any wrenches for blade changing. If you have such a saw, you can rely on a scrap wood piece.
This will keep the blade away from spinning. While using this, you have to be extra cautious. Then loosen or tighten process affects the cutting performance of the blade. If you have blade stops, you are good to go with it.
These can easily lock the blade in its position, and there will be no turning when you change the blade!
Wrap Up
So, you have already learned how to change the blade on the Ridgid table saw. If you have such a table saw like Ridgid R4512 Table Saw, you don’t need to worry anymore! Now, you can change it by yourself!
The process is easy; however, it will require your attention towards your protection. Without proper protection, don’t get your hands on blades. Also, if you are a newbie, make sure you have someone to help you out.
What are you waiting for now? Buy a new blade and replace the old one! Get sharper and smoother cuts from today?
Check out related post